Tomato Concassé

Background: The first time a chef explained tomato concassé to me I was like, “why go through all that trouble to peel and seed tomatoes?” He said, “Some people don’t like peels and seeds.” And that was that. But it is really useful to have on hand in the freezer because it’s another good tomato product to have on hand. It’s not a recipe, it’s a technique. Call it a move, if you like. I’ve outlined the move below:

  1. Wait until roma tomatoes go on sale and then buy as many as you feel like you can process. (Think of your biggest pot and how many rounds of boiling water you want to make.)
  2. Get a spider strainer if you don’t already have one.
  3. Fill the largest pot you have with water and bring it to a boil.
  4. Cut the whole top off as far down as the stem core goes and save those for stock. The tomato should now stand on its head.
  5. Stand all the tomatoes on their heads and score the bottom of each one with an X.
  6. While you are waiting for the water to boil, make an ice bath. Fill the second largest pot you have with ice and then cover the ice with water.
  7. Once the water is boiling, drop the tomatoes in until you see the skins fray up from the X you cut.
  8. Using the spider, transfer the tomatoes from the boiling water to the ice bath to cool.
  9. While they are cooling, start the next batch. The water should still be boiling.
  10. Take the cooled tomatoes out of the ice bath and peel the skins off. Save the skins for another project or for stock.
  11. Freeze a bunch of whole tomatoes at this point. It won’t be concassé, but it will be faster and they will get used.
  12. Cut in half however many peeled tomatoes you feel like chopping.
  13. Scoop out the seed gel with (clean) hands or a spoon. Save for stock.
  14. Dice the tomato halves and use them right away, or freeze.

Why it works:

  1. For me, Roma tomatoes go on sale in the summer and get under $1 a pound. That’s the only time I really feel like doing this.
  2. Spider strainers are great any time you want to reuse boiling water, which you should always be doing. It takes a lot of energy to boil water, why not get a couple preps out of it.
  3. A trick to speeding up the boiling of water is to fill the pot a little ways and then also get an electric tea kettle of water going at the same time. The both the kettle and a smaller amount of water in the pot will boil faster than a whole pot of water.
  4. I use the hack-off-the-top method because I know I will be making stock.
  5. I also use the hack-off-the-top method because I know they will stand up for scoring this way.
  6. For the ice bath, obviously, a big bowl will work as well.
  7. It doesn’t take long to blanche tomatoes.
  8. Since you have a spider strainer, put it to use blanching and chilling. Blanching and chilling also works really well for green beans, broccoli and other green things (like basil) that you want to make and keep really bright green. The blanching brightens the color and stops the enzymatic process that makes them turn muddy when cooked.
  9. You should always be multitasking in the kitchen. (Unless you just want to breathe and daydream.)
  10. My favorite thing to do with tomato skins is to sun dry them or sun dry and smoke them. They are better than sun dried tomatoes because they aren’t so chewy.
  11. If you are freezing them whole, you can just stick them in the freezer whole and grab one when you need one. Or you make larger packets of them using freezer paper if you know you are going to be doing a batch of sauce and/or don’t want loose tomatoes rolling around your freezer.
  12. A lot of things in the kitchen should be done based on how much you feel like doing given the time you have.
  13. Save everything for stock.
  14. Now would be the perfect time to make pico.

Green Apple Tartar Sauce

Background: Back around the turn of the century, I worked in some restaurants as a low-level cook. One of them was a fusion place that served fried oysters with a version of this tartar sauce and a dab of Sriracha on top. One bite would change the way I think about fruit for the rest of my life. Rather than seeing fruit as the thing my mom packed in my lunch to balance out the cold cuts and chips, I started to see fruit as an ingredient. It could change the taste, texture, sweetness, color of my favorite foods. It’s not a recipe. We’re not cooking yet. It’s a series of moves that might be combined with other moves to make a meal.

  1. Keep in stock several jars of capers in your pantry. They don’t have to be fancy.
  2. Keep in stock chipotles in adobo sauce in your pantry.
  3. Stock a couple of large (I use 30 ounce) jars of mayo in your pantry. I use Duke’s.
  4. If you keep fresh lemons on hand, great. If not (or if you want a backup) keep some lemon juice in the freezer.
  5. Grab a Granny Smith apple next time you buy fish at the store. (This works with every fish and shellfish I’ve tried. It can be frozen if that’s the best fish your have access to. I’ve even tried it with canned fish.)
  6. When you feel like eating the fish, do the following moves first: take out about a cup of mayo out of the jar and put it in another container.
  7. Chop up one or two of the chipotles and mix it in with the mayo you took out of the jar. You are doing this for two reasons: to make room to make the sauce in the mayo jar and to make a second spicy sauce.
  8. Dice the apple as fine as you can.
  9. Drain the capers into another jar and save the liquid for quick pickles.
  10. Add the whole bottle of capers and the whole diced apples to the mayo and stir well with a rubber spatula.
  11. Chop up any herbs you want to include and fold those into the jar with the spatula. I often use wild onion and cilantro. Granulated garlic and chives works great, too.
  12. Give it a squeeze of lemon juice.
  13. Serve on or with any fish.

Why it Works:

  1. Capers are a great way to add acidity and a pickle-thing without having to cut up pickles or use premade relish. They keep their shape and flavor and make for a great texture. They are easy to store and relatively cheap.
  2. You can use any hot sauce or pepper for this step.
  3. Of course you could (and should) make your own aioli and try these ingredients in it. It will be great. But that’s not what this is about.
  4. I keep both fresh lemons and frozen lemons on hand so if the fresh ones get used up, I’ll always have something to brighten the sauce.
  5. The great thing about this recipe is that it preserves the apple indefinitely. You will use all the sauce before the ingredients go bad.
  6. This condiment will keep for a while. You might just want to have it on hand so that when you come home with a fresh piece of fish, you already have the sauce made.
  7. As mentioned above, any hot sauce or pepper can be used to make a spicy mayo. I like to use canned chipotle peppers and split them between this move and a chipotle ketchup that I make from accumulated ketchup packets. When I’m done, I have 3 quick versatile sauces that can be used for a number of things.
  8. Dice it fine so the mayo can be spread on a sandwich.
  9. The caper brine is great for pickling things like cactus flower buds or onion flower buds. (You know, since a caper is a pickled flower bud.)
  10. The rubber spatula (or even better, spoonula) should fit through the mouth of the jar and all the way to the bottom of the jar. If you don’t have multiple sizes of rubber spatulas, you should.
  11. Dill would be a natural choice here, but I avoid it because it’s kind of one-note to me. If I put dill in it, I feel like it only goes with fish. With other choices, I keep it open for things like a quick turkey sandwich.
  12. The lemon adds the acidity, but don’t overdo it. You want it to remain mayonnaise consistency.
  13. One of my favorite things to do with this is–after a great meal of trout or salmon–mix the leftovers with the sauce like tuna salad for a great sandwich the next day. You could add some celery or a hard-boiled egg, but it doesn’t need anything. Sometimes, I’ll throw in a can of smoked trout or tuna if there aren’t enough leftovers of the fresh fish.

Mods:

  1. You can add more things to this without messing it up. A huge range of herbs would work, as would roasted garlic, shallots, or other alliums.
  2. You can add it to a wide range of things in addition to fish sandwiches. I’ve used it on turkey burgers, etc. I think of it more as a mayo than a tartar sauce. You know how mayo works.
  3. You could make it because you are planning to have fish. But you can also make it because you have 3/4 of an apple that your kid didn’t eat. (It doesn’t have to be a granny smith, but I like the tartness they bring.) The sauce will keep the apple from oxidizing.

Pico de Gallo

Background: If I have them, I use tomatoes from my garden whenever I can. If I don’t have any growing and but they are available locally in season, I’ll buy fresh tomatoes in bulk when they are on sale and make tomato concassé to freeze. When I’m out of those, I turn to my pantry. Y’all know what I use in my No Cook Pizza Sauce move. I use the same thing to make Pico de Gallo: strained, diced, fire roasted canned tomatoes. Fresh, concassé, and canned tomatoes all make a different version of this, but the rest of the ingredients are the same. We’re not really cooking yet (we’ll get there), and it’s not really a recipe. It’s a series of moves, which I’ve outlined below:

  1. Get a medium can (15.5 oz) of diced, roasted tomatoes. Drain the roasted tomatoes, reserving the liquid in the fridge for soups and sauces. Place in a large glass bowl.
  2. I always have several kinds of preserved onions on hand, but for this I use the fresh diced white onions quick pickled in a white vinegar brine that are always in my fridge. I fork them out of the jar, not minding the extra bid of vinegar. Add these to the bowl.
  3. Chop up the leaves of cilantro. I always use cilantro from the garden unless I don’t calculate my seasons right or a freeze or drought kills off my fresh supply. Store bought is totally fine though. Save the stems for soup. (See No. 5 under mods.)
  4. Stir everything together, cover, and chill.
  5. Garnish with lime wedges. I don’t add the lime to the mix before hand because the flavor changes over time.

Why it works:

  1. For the first step, I have to address the canned veg thing. I generally don’t like canned vegetables for all kinds of reasons, but tomatoes are the exception. While sodium is a concern with canned foods–the brand of tomatoes I use has 280 mg of sodium per serving–this is mostly a garnish, so the sodium doesn’t bother me. In fact, in this instance, I like it because I don’t have to add salt. The salt in the tomatoes actually preserves the product.
  2. The brine is just a low-acidity vinegar, salt and onions. Because of the sweetness of the onions, I don’t even use sugar. I know I’m going to use limes at service, so I don’t want too much acidity, but I will sometimes put a tablespoonful or two of the onion brine in the mix.
  3. When considering herbs, I’ll turn to dried if I’ve dried it from my own garden. It makes a different product in that instance, so I’ll grind up some of the coriander seeds with it. It takes things in a different direction, but I’m ok with that. If I have to make a trip to the store, I’ll buy the fresh stuff. When the wild green onions are out in Central Texas, I’ll forage some and throw them into the mix.
  4. The bowl I use is important here. It fits the right amount of pico based on the can size. It has a flat glass lid so I can always see at a glance how much pico I have left and/or I can stack things on top of it. This is important because it, like my butter dish, is always in my fridge, unless it’s being cleaned. So it has to fit in the fridge and not also make the airspace above it unusable.
  5. Garnish with lime wedges. I don’t add the lime to the mix before hand because the flavor changes over time. Left without the lime just, it is made from already-preserved products so it will last days in its original form. Over weeks, the flavors and textures will change, but it won’t go bad. It just gets incorporated into something else.

Mods:

  1. Sometimes I put the same garlic confit I use in the No Cook Pizza Sauce in there. Sometimes I use (gasp) granulated garlic. I never add fresh garlic though because I’m aiming for consistency and refrigerator-shelf-stability and fresh garlic is (ahem) dicey.
  2. Pico usually has fresh chilies in it. I don’t add to my stock pico on the off chance that a kid wants to try a vegetable. But I always have homegrown chilies in my garden, in my fridge, in my freezer, and (dried) in my pantry. So if I’m cooking for adults I can add a habanero, serrano, or jalapeño.
  3. I’ll add it to mashed avocado for a really quick quac that doesn’t need much of anything else. But you can also invert the quantities and add the avocado to it.
  4. Throw in some chilled seafood and you’ve got a nice cold salad. Or throw some (gasp) canned seafood in it and you’ve got what I like to think of as Baltic Avenue ceviché.
  5. Add it to chicken stock with leftovers from a rotisserie chicken, garnish with leftover tortilla chips and you’ve got a kind of chicken tortilla soup.

No Cook Pizza Sauce

Background: I love to cook from scratch. If I could hunt and fish and forage for all my own food, I would. (I can’t.) If I could grow all the tomatoes and garlic and oregano and basil I needed for marinara, I would. (I can’t.) I don’t like industrially processed food. (I eat it, like everyone, but I don’t like it.) However, I have about 7 different canned goods that I regularly rely on. (I counted.) Two of them I use in my pizza sauce: a small can of tomato paste and a can of diced, fire roasted tomatoes. Add roasted garlic preserved in olive oil and you have the basis for a ton of different sauces. Remarkably, my kids will eat it in this form. It’s not really cooking. It’s not a recipe. It’s a series of moves, which I’ve outlined below:

  1. Source high quality roasted garlic confit or make your own. When I can’t make my own or don’t 100% trust the garlic, I use oil-marinated roasted, seasoned garlic from the specialty foods store’s olive bar. Keep it on hand in the fridge.
  2. Get a small can of tomato paste (6oz.) and a medium can (15.5 oz) of diced, roasted tomatoes. Drain the roasted tomatoes, reserving the liquid in the fridge for soups and sauces.
  3. Add both cans to a food processor, add garlic confit to taste, and pulse to desired consistency in a food processor.
  4. Portion out the amount needed for the night’s pizza party and freeze the rest in batches of the same size. For our house, this makes 8 pizzas unless it gets diverted into a different meal stream.
  5. If you are feeding kids, but you are pizza’d out, experiment with adding ingredients you love, and always have on hand, and make yourself something different. We’ve experimented with various incarnations of chicken parm, including a version made from cast off dino chicken. (If you have no idea what I’m talking about, congratulations on your life choices.) Meatball sandwiches would be a great idea if you keep meatballs on hand and eat meat. (Try plant-based frozen chicken parm if you don’t.)

Why it works:

  1. Bad garlic will sink anything and everything it touches. If it’s rancid or even processed in a weird way, you will never cover up the taste. (For me this includes all garlic that comes in jars but isn’t pickled.) Using stored garlic confit means both consistency and that you save time that you would have spent peeling and roasting (or otherwise processing) raw garlic, which wouldn’t work in this move.
  2. The combination of the two cans of tomato products makes the perfect consistency for pizza sauce once you’ve drained the diced toms. While sodium is a concern with canned foods, the result of this is relatively low sodium or at least well within the acceptable range for me. The brand of tomatoes I use has 280 mg of sodium per serving, but the tomato paste only has 25 mg. Combined, that’s 1105 mg of sodium across the batch. Divide that by 8 pizzas and that’s just over 138 mg of sodium in the pizza sauce for one pizza.
  3. The garlic confit I use is also flavored with herbs. There’s citric acid and salt in the cooked tomato products. So there’s no additional herb, acid, oil or salt needed. This means there’s no need for tinkering with all the little bottles and jars, adjusting as you pulse (and potentially going too far and making a mess).
  4. You are essentially making a freezer staple from fridge and pantry staples. So it’s always available. I store mine in reused plastic restaurant containers labeled with Sharpie. You can write right on the lids. They are stack-able. I wash them in the dishwasher until they break and then recycle them. I don’t heat things in the them though, especially tomato products. So you’ll want to pull your sauce out the day before a pizza party. But even if it’s the same night, just nuke it in a glass container to defrost and it will be fine. The garlic is expensive if you buy it from the fancy olive bar like I do, but it’s worth it to me. The affordability of the rest of the ingredients offsets the price of the garlic.
  5. Because it’s an inexpensive staple that’s always on hand and requires no cooking and little waste, you can experiment with it endlessly. I use it to preserve veggies from the garden when I have too many zucchini or something. Because everyone in the house will eat it in some form, it can be the vegetable-based center of a meal. It’s a veggie situation that’s high in Lycopene, which is good, and has some other vitamin and mineral benefits, too.

Mods:

  1. I’m not even going to list that many mods for this one because y’all know what to do with pizza sauce and I’ve mentioned some above. That said….
  2. Pasta sauce is an obvious choice here, but consider what you put the sauce on. Thin it out, cook down some some chopped fresh vegetables in the liquid (think squashes, mushrooms, onions, carrots), and then put the pizza cheese on there and see if the kids will eat it.
  3. Add a can of chipotle peppers in adobo sauce like the ones pictured here and you can take it in a totally different direction with very little effort.
  4. Ground beef plus chilies = chili. Ground beef by itself = spaghetti sauce. You get the idea.

Pork Tenderloin in Soy Sauce

Background: I want to hate the air fryer for so many reasons. It’s plastic. It’s poorly named. (Obviously, it’s a mini convection oven, not a fryer.) It’s a fad gadget. But this one recipe made me love the air fryer despite my inclinations. The recipe actually isn’t a recipe. It’s a series of moves, which I’ve outlined below:

  1. Get an untrimmed, unmarinated 2 pack of pork tenderloin and use a narrow filet knife to trim off all the fat, any pieces sticking out or flopping around, anything that looks like a different color (usually white fat, silver skin, clear membranes.) Put these in butcher paper marked “pork for grind” to grind into sausage later. You should have two cigar-shaped pink pieces of meat and about 1/2 a pound of trim.
  2. Freeze the trim. It will come in handy later.
  3. Marinate in extra dark soy sauce. I use Lee Kum Kee Premium Dark Soy Sauce. I get it at an Asian market. It looks like this. You can marinate for 20 minutes or 2 hours. I think I’ve even done it overnight, but my standard is probably about an hour. The longer you do it, the saltier and darker your meat is going to be. Turn it in the marinade halfway through to get even coverage.
  4. Roast it in the air fryer for 15 minutes at 370 degrees. Pull it out and check the temp for your desired doneness. I use this chart and aim for the middle of the roast, the fattest part, to be on the low end of chef temp for pork, between 135 degrees and 140 degrees. Adjust time and temp accordingly.
  5. Rest for 15 minutes. Cover loosely with foil.
  6. At this point, you have several options. I usually slice one with the thickness of a standard sharpie and serve it right away and wrap the other in the foil I used to cover it while resting to use for leftovers the next day. If you do this, pour the juices that came out during the rest back over the meat before wrapping. If you find yourself serving and eating both of them, it might be worth it to do 3 or even 4 at a time, depending on the size of your air fryer.

Why it works:

  1. Trimming aggressively also shortens cook time and helps convection. (I learned that last bit in a discussion about vorticity with Aaron Franklin at Camp Brisket. The way the air and smoke swirls around the meat matters.)
  2. Tenderloins are pricier cuts of meat, so using the trim for sausage brings the cost down.
  3. The extra dark soy sauce clings to the meat and the convection of the air fryer dries the outside of the meat with the clingy soy sauce quickly. This results in a roast that looks like it has a beautiful bark, but isn’t overcooked.
  4. The shape of the tenderloin and the short cook time mean that the different sections of the roasts come out to different levels of doneness. In my family, this is a win. My wife likes the more done end pieces and my son and I like the juicy middle pieces. Sometimes I like to just eat the end pieces and save the rare middle pieces for tacos or quick soups or stews the next day. They won’t get overdone in the reheat if they start out on the rare side.
  5. The rest is crucial. I sometimes rush it to 10 minutes, but never less than that. Resting makes for juicer results. Flip once in the juices during the rest.
  6. Leftovers are key to this recipe. It’s easily 3 meals in our house. (There are 5 mouths, but at any given meal, two aren’t that hungry.) One the first night, another the next day. But you have to properly care for the leftovers. The frozen trim is easy, but the meat can oxidize if not treated properly. If I know it’s going to be less than 24 hours before I get back to the leftovers, I’ll wrap tightly in foil. If I’m not sure, I’ll slice or dice the meat and then store the pieces in some broth, stock, or any soup I have in the fridge. Dig the pieces out and reheat in a pan with a little liquid and you have tacos. Leave in the broth and reheat and you have stew. The key is the liquid covering the meat keeps it from oxidizing and it will keep as long as the liquid does.

Mods:

  1. I’m curious about how the recipe would work with and even more aggressive trim. I would freeze up the roasts a bit before trying.
  2. If I was feeling rich, I might try this with a beef tenderloin.
  3. If my kids liked it, I would cover the whole thing in black pepper after the marinade.
  4. I usually serve this with rice or potatoes and usually a quick slaw, but I wonder about using another salty source of clingy umami to take it in another direction.
  5. I cut a hole in one of my air fryers and connected smoke gun to it. It’s more for ambiance than anything, but it makes the air fryer smell more like a bbq pit than a piece of plastic.
  6. I’d love to try the leftovers hot and cold.

Creating Pockets of Adaptation

The weather, the news, disenchantment with the city, my penchant for Epicurean politics (i.e. retreat from them), and an apparently insatiable appetite for watching videos of people doing chores, off-grid, in cold environments, have all left me in a bit of a run-for-the-hills kind of mood. I daydream of just getting a plot of land in the mountains of Not Texas and just taking my family and whatever we can fit into (or strap onto) our cars and just seeing what life would be like if we lived intentionally on a homestead. This is a fantasy. We have kids in school, a suburban house, jobs that aren’t remote, student loans, etc. In my daydreams, we move into the wilderness by choice. In my nightmares, we move out of necessity because of some sort of disaster. In my reality, we just keep grinding. It’s possible that all this grinding will help bring about said disaster.

Culturing Food Hubs

In what might become a tradition for FoodMoves, I took the summer off. I took my first math class in 27 years (I got a huggable B.) I picked up a wooden canoe, built for me by this guy, as a tribute to my late father who died in the water during COVID. And I tried to fix some things around the house. When I left off, my fridge was on the fritz. I’m happy to report it is currently running. However, it’s so hot in Austin that I’m (literally) making yogurt in the ambient temperature in the back yard. As I consider the disasters swirling around us, I’m thinking the fermentos might have had it right. Things could get so bad that refrigeration isn’t available, at least not for everyone, and/or at least not all the time. Some people living on solar or off grid may choose to downsize their fridges and make more room for fermentation. Fermentation is the ultimate disaster move when it comes to saving food, from putting up pickled foods for the future, to making sure a bumper crop of cabbage doesn’t rot, to preserving fruits that are available only for a moment (like the mustang grapes that were ripe and then gone in the blink of an eye this summer).

Chillin’ With a Broken Fridge

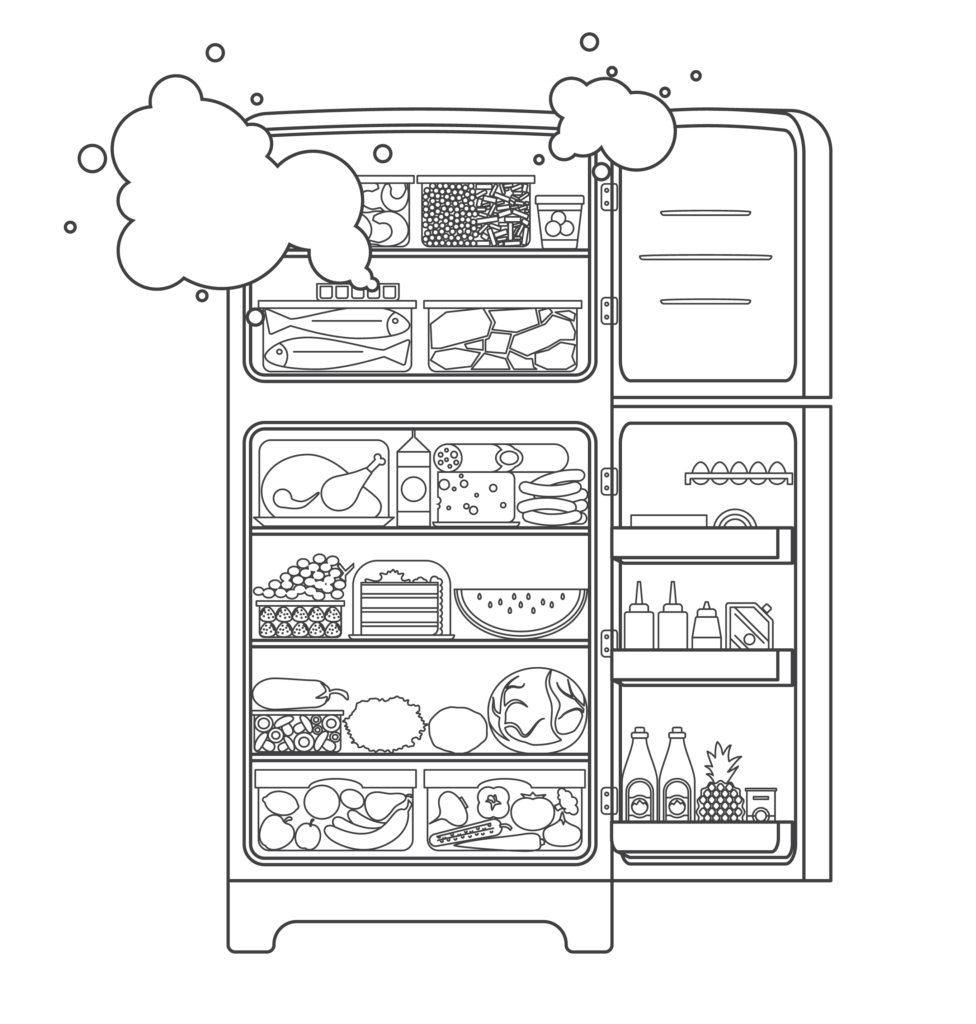
Line drawing of a refrigerator filled with food.

My refrigerator was on the fritz this past week. Normally when this happens, I take the back off, clean the coils, move some food around, take a hair dryer to any accumulated ice, adjust the temp settings, and hope that does the trick. This time, the freezer was working, but the fridge was not. When my normal tricks didn’t work, I began moving food to the backup fridge and freezer. (We have solar generation to power these because, well, Texas. They also come in handy for non-grid-related events and small emergencies, like this one. But I find myself increasingly thinking of only using refrigeration that I could power completely with solar power. More on that in another post.) While doing this bit of extra work and thinking about what might be going on with the fridge, I remembered back to something I read about people who think refrigeration isn’t necessary or guaranteed. There’s a subculture of so-called “fermentos” who believe in the power of fermentation not just to create deliciousness (and alcohol), but also to aid in self-reliance in the event that power and/or refrigeration becomes dicey in terms of access.

Transmitting Bugs, Transmitting Affect

Line art of a virus

As I write this, I’m on day 7 of a stomach bug. One the ways that food moves is biologically, which is to say, “through us.” And food has been moving very quickly through me for the past week. I’m the type of patient who initially tries to figure out how (and from whom) I got the bug and whether it’s viral or bacterial. My family has been sick a lot in the past month. Only one of the five of us hasn’t had some form of intestinal distress. So in my head, I’m pointing fingers. On top of that, I’m cranky. It’s not a good look. I do not like this about myself, and I’m trying to change my thinking.

When I’m in this kind of mood, I try to create a web of connections that makes individual judgment seem kind of reductive and not really that significant. What is interesting about this situation isn’t the fact that kids in daycare bring home literal and figurative bugs. It’s not the fact that I can’t eat (which is my main focus). Parents of young kids are accustomed to this (even if our bodies are not). It’s not the general fact of transmission of viruses and bacteria in the world. I kind of got my fill of that kind of discussion during Covid. Even after Covid, I’m not even versed enough in science to have an informed opinion about the transmission of viruses. However, the particular transmission of this particular bug (if that is what it is) has shut me down enough to make me stop and think about all the other things that we are transmitting to one another, some of which are very interesting.

For example, In The Transmission of Affect Teresa Brennan writes about how we transmit feelings to one another not just through words, but also through hormones. She writes, “the behavior of hormones has a profile that fits with what we have learned so far about the transmission of affect; and what we have learned is that such transmissions affect the subject’s intentionality, insofar as the subject’s agency is composed of its affects or passions” (76). Pheromones can jump between individuals, influencing behavior.

Communicating Foods

In my early to mid ’30s, I taught introductory argumentation in college, and I studied what was being called, for a moment, rhetorics of food. My ambition was to study the ways in which food and communication traveled together through networks. I wasn’t alone. After writers like Michael Pollan and Eric Schlosser and filmmakers like Richard Linklater and Morgan Spurlock released some powerful arguments, there was a fair amount of interest in argumentation related to global food systems. Popular media and journalism, as well as community activism, amplified many trends that would change the way we eat. In higher education, teachers of writing had used food writers like Calvin Trillin for years. However, in the early aughts, there was a shift in thinking. Instead of the using the work of food writers to model good writing, many scholars began arguing that food is an expressive media that moves along and intersects with writing. For example, in the book Food Is Culture (2004), Massimo Montanari argues for a connection between rhetoric and food. Montanari writes that “food acquires full expressive capacity thanks to the rhetoric that in every language is its necessary complement” (102). He continues, articulating food as one of the available means of persuasion. “Rhetoric is the adaptation of speech to the argument, to the effects one wants to arouse or create. If the discourse is food, that means the way in which it is prepared, served, and eaten” (102). Without the rhetorical trappings involved in preparation, service, and consumption, food would be slop. But so interconnected are the rhetorical aspects of food with the food itself, that even the act of unceremoniously serving gruel is laden with rhetorical significance.